Original article: New Technique Improves Finishing Time for 3D Printed Machine Parts
Original author: Matt Shipman
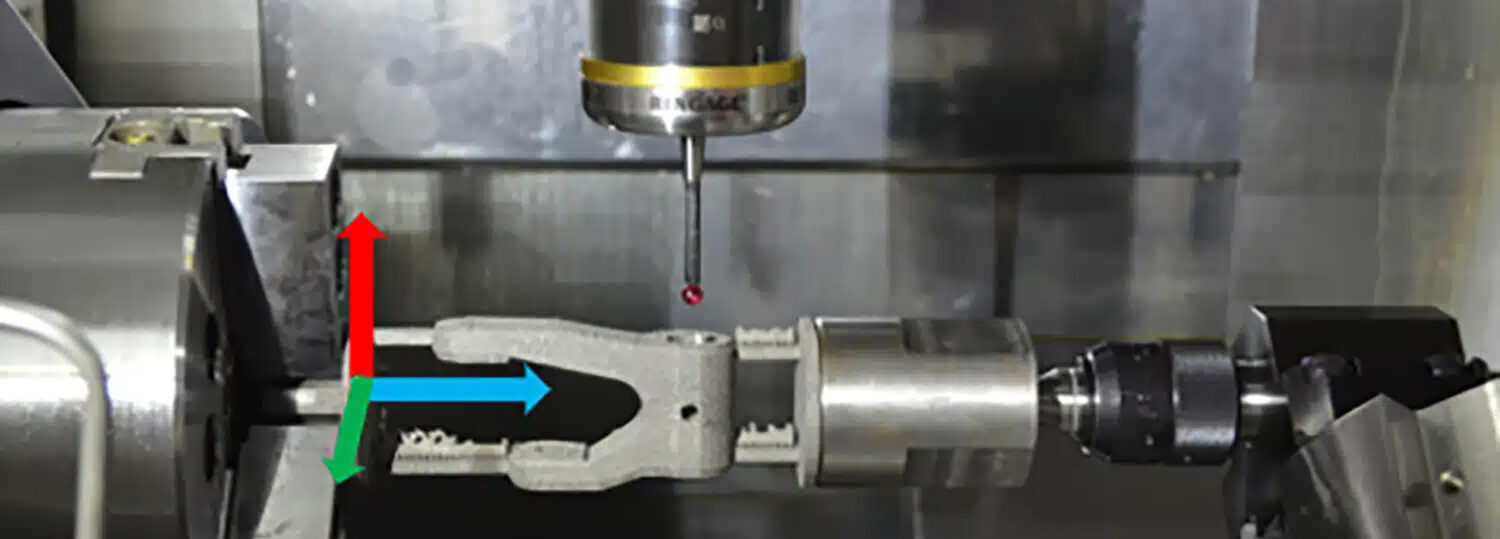
North Carolina State University researchers have demonstrated a technique that allows people who manufacture metal machine parts with 3D printing technologies to conduct automated quality control of manufactured parts during the finishing process. The technique allows users to identify potential flaws without having to remove the parts from the manufacturing equipment, making production time more efficient.
“One of the reasons people are attracted to 3D printing and other additive manufacturing technologies is that these technologies allow users to quickly replace critical machine components that are otherwise difficult to make outside of a factory,” says Brandon McConnell, co-corresponding author of a paper on the work. “And additive manufacturing tools can do this as needed, rather than dealing with supply chains that can have long wait times. That usually means using 3D printing to create small batches of machine parts on demand.” McConnell is an assistant research professor in NC State’s Edward P. Fitts Department of Industrial and Systems Engineering.
After a metal machine part is printed, it requires additional finishing and has to be measured to ensure the part meets critical tolerances. In other words, every aspect of the part must be the right size. Currently, that involves taking a part out of the relevant manufacturing equipment, measuring it, and then putting it back into the manufacturing equipment to make modest adjustments.
“This may need to be done repeatedly, and can take a significant amount of time,” McConnell says. “Our work here expedites that process.”
Specifically, the researchers have integrated 3D printing, automated machining, laser scanning and touch-sensitive measurement technologies with related software to create a largely automated system that produces metal machine components that meet critical tolerances.
Here’s how it works.
When end users need a specific part, they pull up a software file that includes the measurements of the desired part. A 3D printer uses this file to print the part, which includes metal support structures. Users then take the printed piece and mount it in a finishing device using the support structure. At this point, lasers scan the mounted part to establish its dimensions. A software program then uses these dimensions and the desired critical tolerances to guide the finishing device, which effectively polishes out any irregularities in the part. As this process moves forward, the finishing device manipulates the orientation of the printed part so that it can be measured by a touch-sensitive robotic probe that ensures the part’s dimensions are within the necessary parameters.
To test the performance of the new approach, researchers manufactured a machine part using conventional 3D printing and finishing techniques, and then manufactured the same part using their new process.
“We were able to finish the part in 200 minutes using conventional techniques; we were able to finish the same part in 133 minutes using our new technique,” McConnell says. “Depending on the situation, saving 67 minutes could be incredibly important. Time is money in most professional settings. And in emergency response contexts, for example, it could be the difference between life and death.”
The researchers note that this work focuses on printing and finishing machine parts that include circles or cylinders, such as pistons. However, the approach could be adapted for machine parts with other features.
“All of the hardware we used in this technique is commercially available, and we outline the necessary software clearly in the paper – so we feel that this new approach could be adopted and put into use almost immediately,” McConnell says. “And we are certainly open to working with partners who are interested in making use of this technique in their operations.”
The paper, “Automatic Feature Based Inspection and Qualification for Additively Manufactured Parts with Critical Tolerances,” is published in the International Journal of Manufacturing Technology and Management. First author of the paper is Christopher Kelly, a former graduate student at NC State who now works for Celonis, Inc. The paper was co-authored by Richard Wysk, professor emeritus in the Fitts Department of Industrial and Systems Engineering; Ola Harrysson, Edward P. Fitts Distinguished Professor in the Fitts Department of Industrial and Systems Engineering; and Russell King, the Henry L. Foscue Distinguished Professor of Industrial and Systems Engineering at NC State.
The work was done with support from the U.S. Army Research Office, under grant number W911NF1910055.
“Automatic Feature Based Inspection and Qualification for Additively Manufactured Parts with Critical Tolerances”
Authors: Christopher J. Kelly, Deloitte; Richard A. Wysk, Ola A. Harrysson, Russell E. King and Brandon M. McConnell, North Carolina State University
Published: May 1, International Journal of Manufacturing Technology and Management
DOI: 10.1504/IJMTM.2024.138337
Abstract: This work expands the capabilities of the Digital Additive and Subtractive Hybrid (DASH) system by including “geometric qualification” of mechanical products. Specifically, this research incorporates the extended Additive Manufacturing Format files (AMF-TOL) which include American Society of Mechanical Engineers (ASME) Y14.5 specifications for planes, cylinders and other features so that “in-process” inspection can be completed automatically. An example for the production of holes is provided to illustrate On-Machine-Measurement collects sample radii to estimate the size and position of finished cylindrical features. Statistical analysis was used to measure bounds for comparison to specified tolerance callouts to determine whether a part is within specification, within a user-defined level of confidence. Seven different sampling strategies were evaluated on a DASH part including the bird cage sampling strategy defined in ISO-12180. Part data was utilized to show that for large data samples no statistically significant difference in accuracy was identified for four methods. Finally, analysis shows that using the DASH process with automatic inspection is economically advantageous for low volume production runs.

